Getting Started with Data Extractor
Getting Started with Data Extractor
You will define and run a basic data extract in this tutorial.
The data will be retrieved from a SQL Compact 3.5 database and written to a comma delimited text file.
- Make sure you are on the Data Extractor With Data Masking Main Form.
- Verify that the following value is set:
- Extractor Definitions Save Folder = C:\Users\YourUsername\Documents\pfApps\pfDataExtractor\Definitions\
- If necessary, you can use the Browse For Folder button to find the folder.
- Set the following values:
- Extractor Name = FirstExtractorDefinition
- Extract Data From = Relational Database
- To = Text File (Delimited)
- Click the From tab to make it the current tab.
- Set the following values:
- Database Type = SQLServerCE35
- Connection String for Database =data source='C:\Users\YourUsername\Documents\pfApps\pfDataExtractor\SampleData\SampleOrderDataCE35.sdf';
- You can either Copy and Paste the above connection string to the form
- Or
- You can use the Connection String Manager to get the connection string:
- Click the Show Connection String Manager button.
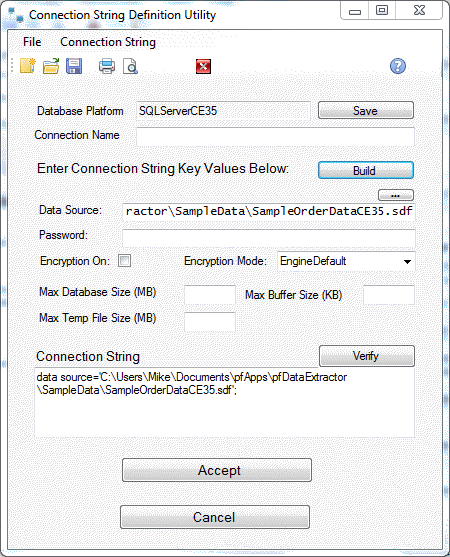
- The following values should be automatically filled in:
- Database Platform = SQLServerCE35
- Connection Name = Blank
- Data Source = C:\Users\YourUsername\Documents\pfApps\pfDataExtractor\SampleData\SampleOrderDataCE35.sdf
- Password = Blank
- Encryption On = False (Unchecked)
- Encryption Mode = EngineDefault
- Leave all other values as blank.
- Click the Build Button.
- The Connection String area at the bottom of the form will be filled in with the connection string text.
- Click the Verify Button,
- You should see a popup message saying the connection was successful.
- If message says connection failed, you will have to verify that the file identified in the Data Source field above exists.
- The connection string form should now look like the following:
- Click the Accept Button to return to the Main Form.
- SQL Query =
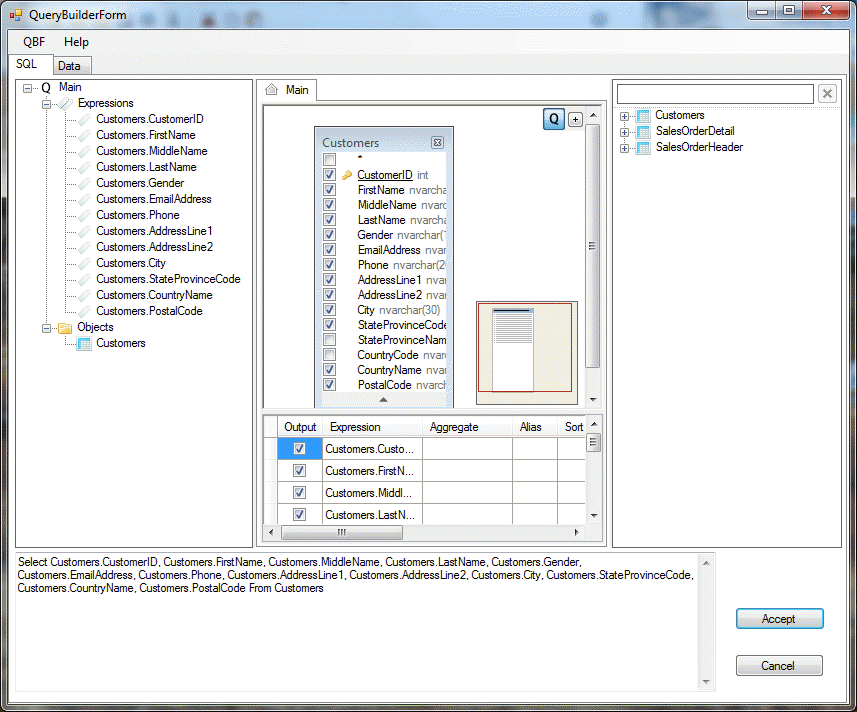
Select Customers.CustomerID, Customers.FirstName, Customers.MiddleName, Customers.LastName, Customers.Gender, Customers.EmailAddress, Customers.Phone, Customers.AddressLine1, Customers.AddressLine2, Customers.City, Customers.StateProvinceCode, Customers.CountryName, Customers.PostalCode From Customers
- You can Copy and Paste the above text to the SQL Query area of your extract definition form
- Or
- You can use the Show Query Builder button to define the query using a visual SQL Builder interface.
- See Query Builder Overview for information on how to build SQL queries using the Query Builder.
- Your completed query should look like the following on the Query Builder
 :
:
- Output Options
- Add Row Number to Output = False (Unchecked)
- Filter Output = False (Unchecked)
- Randomize Output = False (Unchecked)
- Max Preview Rows = 500
- Erase Output Log Before Each Extract is Run = True (Checked)
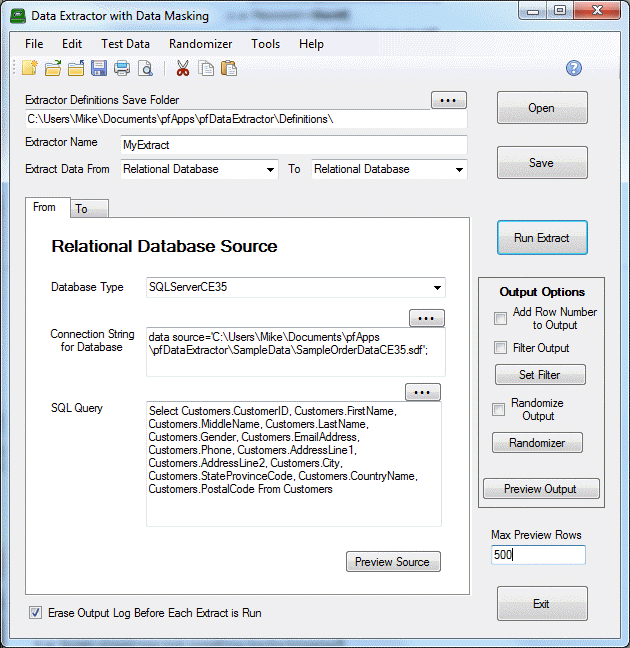
- Screen should now look something like the following:
- Click Preview Source button.
- You should see a Data Output Grid with 500 rows displayed.
- Set Max Preview Rows = 1000
- Click Preview Source button again.
- You should see a Data Output Grid with 1000 rows displayed.
- Click Exit on the Data Output Grid to return to the Main Form.
- Click the Save button.
- Windows File Save As Dialog will be shown.
- Save definition to FirstExtractorDefinition.exdef in C:\Users\YourUsername\Documents\PFApps\pfDataExtractor\Definitions
- Click the To Tab.
- You should now see the Text (Delimited) Destination tab.
- If you don’t see the Text (Delimited) Destination tab, select Text File (Delimited) from the To drop-down list box.
- Click the File Save As Dialog button.
- Set File Name = FirstExtractorDefinition.txt.
- Leave the file path at C:\Users\YourUsername\Documents\PFApps\pfDataExtractor\Destinations\TextFiles\Delimited
- Click the Save button to return to the main form.
- Make sure the following values are set:
- Overwrite Text File if it Already Exists = True (Checked)
- Column Delimiter = Comma Separated
- Line Terminator = CR/LF
- Include Column Names on First Line of Output = True (Checked)
- String Values Surrounded with Quotation Marks = False (Unchecked)
- Click the Save button.
- Click OK at prompt with the file path listed on it.
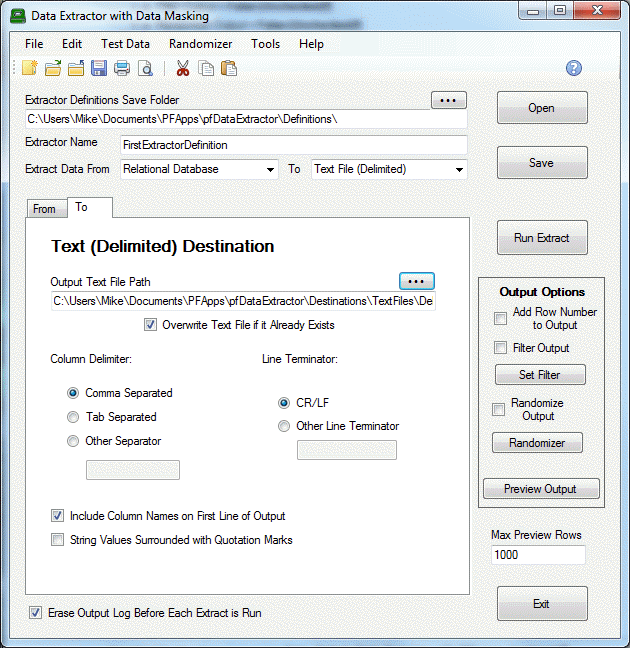
- Main Form should now look like this:
- Set Max Preview Rows = 500
- Click Preview Output button.
- You should see a Data Output Grid with 500 rows displayed.
- Click Exit on the Data Output Grid to return to the Main Form.
- Set Max Preview Rows = 1000
- Click Preview Output button.
- You should see a Data Output Grid with 1000 rows displayed.
- Click Exit on the Data Output Grid to return to the Main Form.
- Click the Run Extract button.
- You will see an output message box saying the extract finished and the amount of time it took to generate the extract.
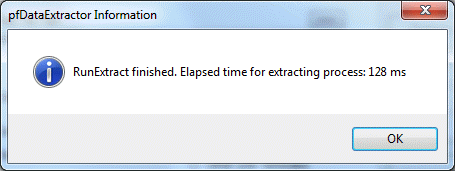
- Click the Run Extract button.
- You can see the comma delimited file at the location you specified earlier on the Text (Delimited) Destination tab.
.C:\Users\YourUsername\Documents\PFApps\pfDataExtractor\Destinations\TextFiles\Delimited\FirstExtractorDefinition.txt